With every paid subscription you can setup custom domain name to your deploy plans.
To start you need to have domain registered with any domain provider with DNS zone management support (most of them include is free of charge). If you don’t have domain yet, we recommend use Cloudflare to but and manage domain name.
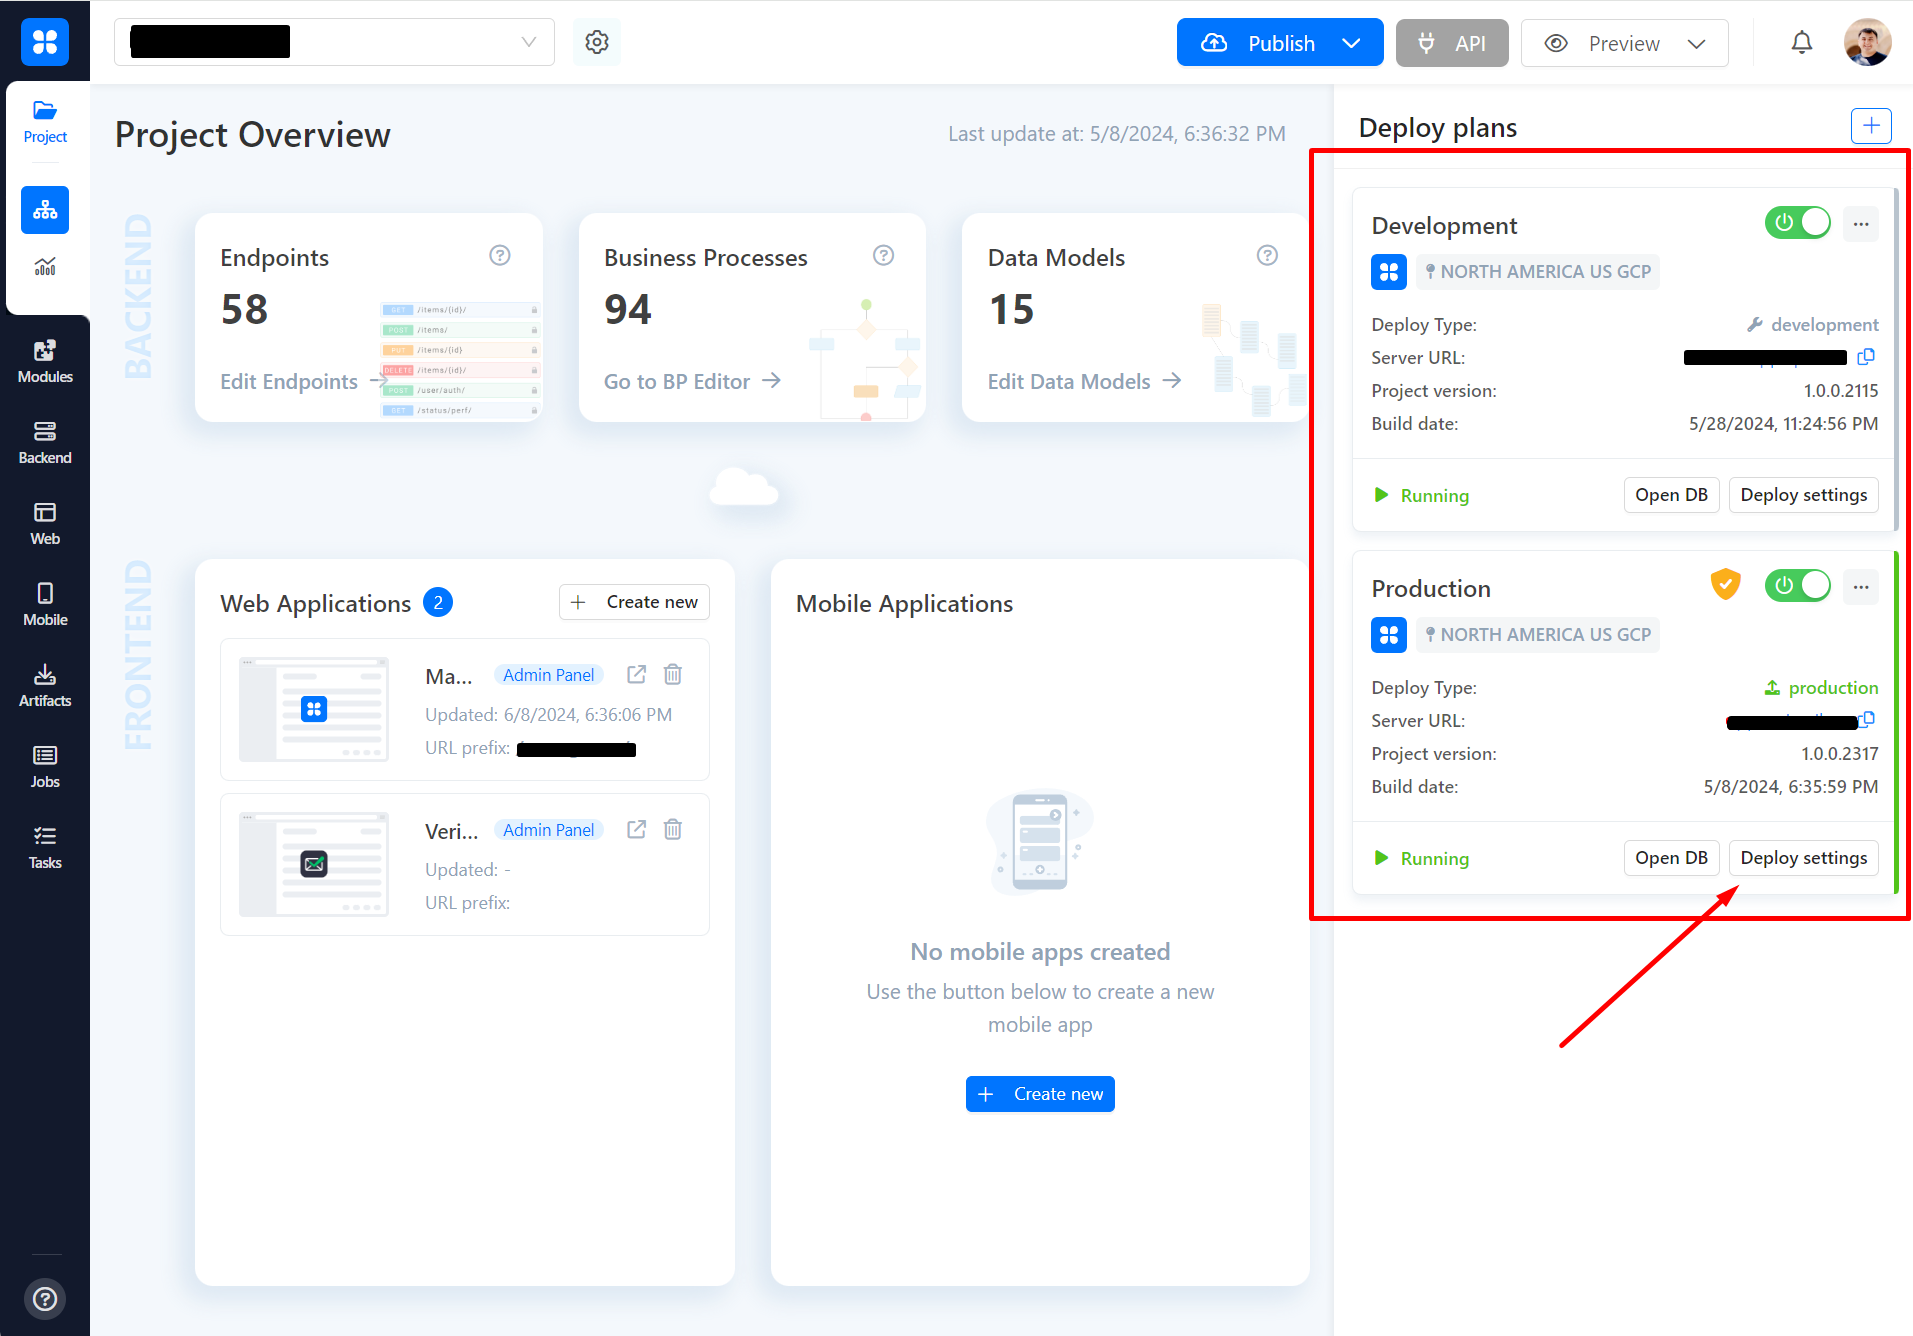
- Open your deploy settings in AppMaster Studio (Project Overview → Right panel → Deploy Settings)
- At the bottom of modal get our DNS name for custom domains
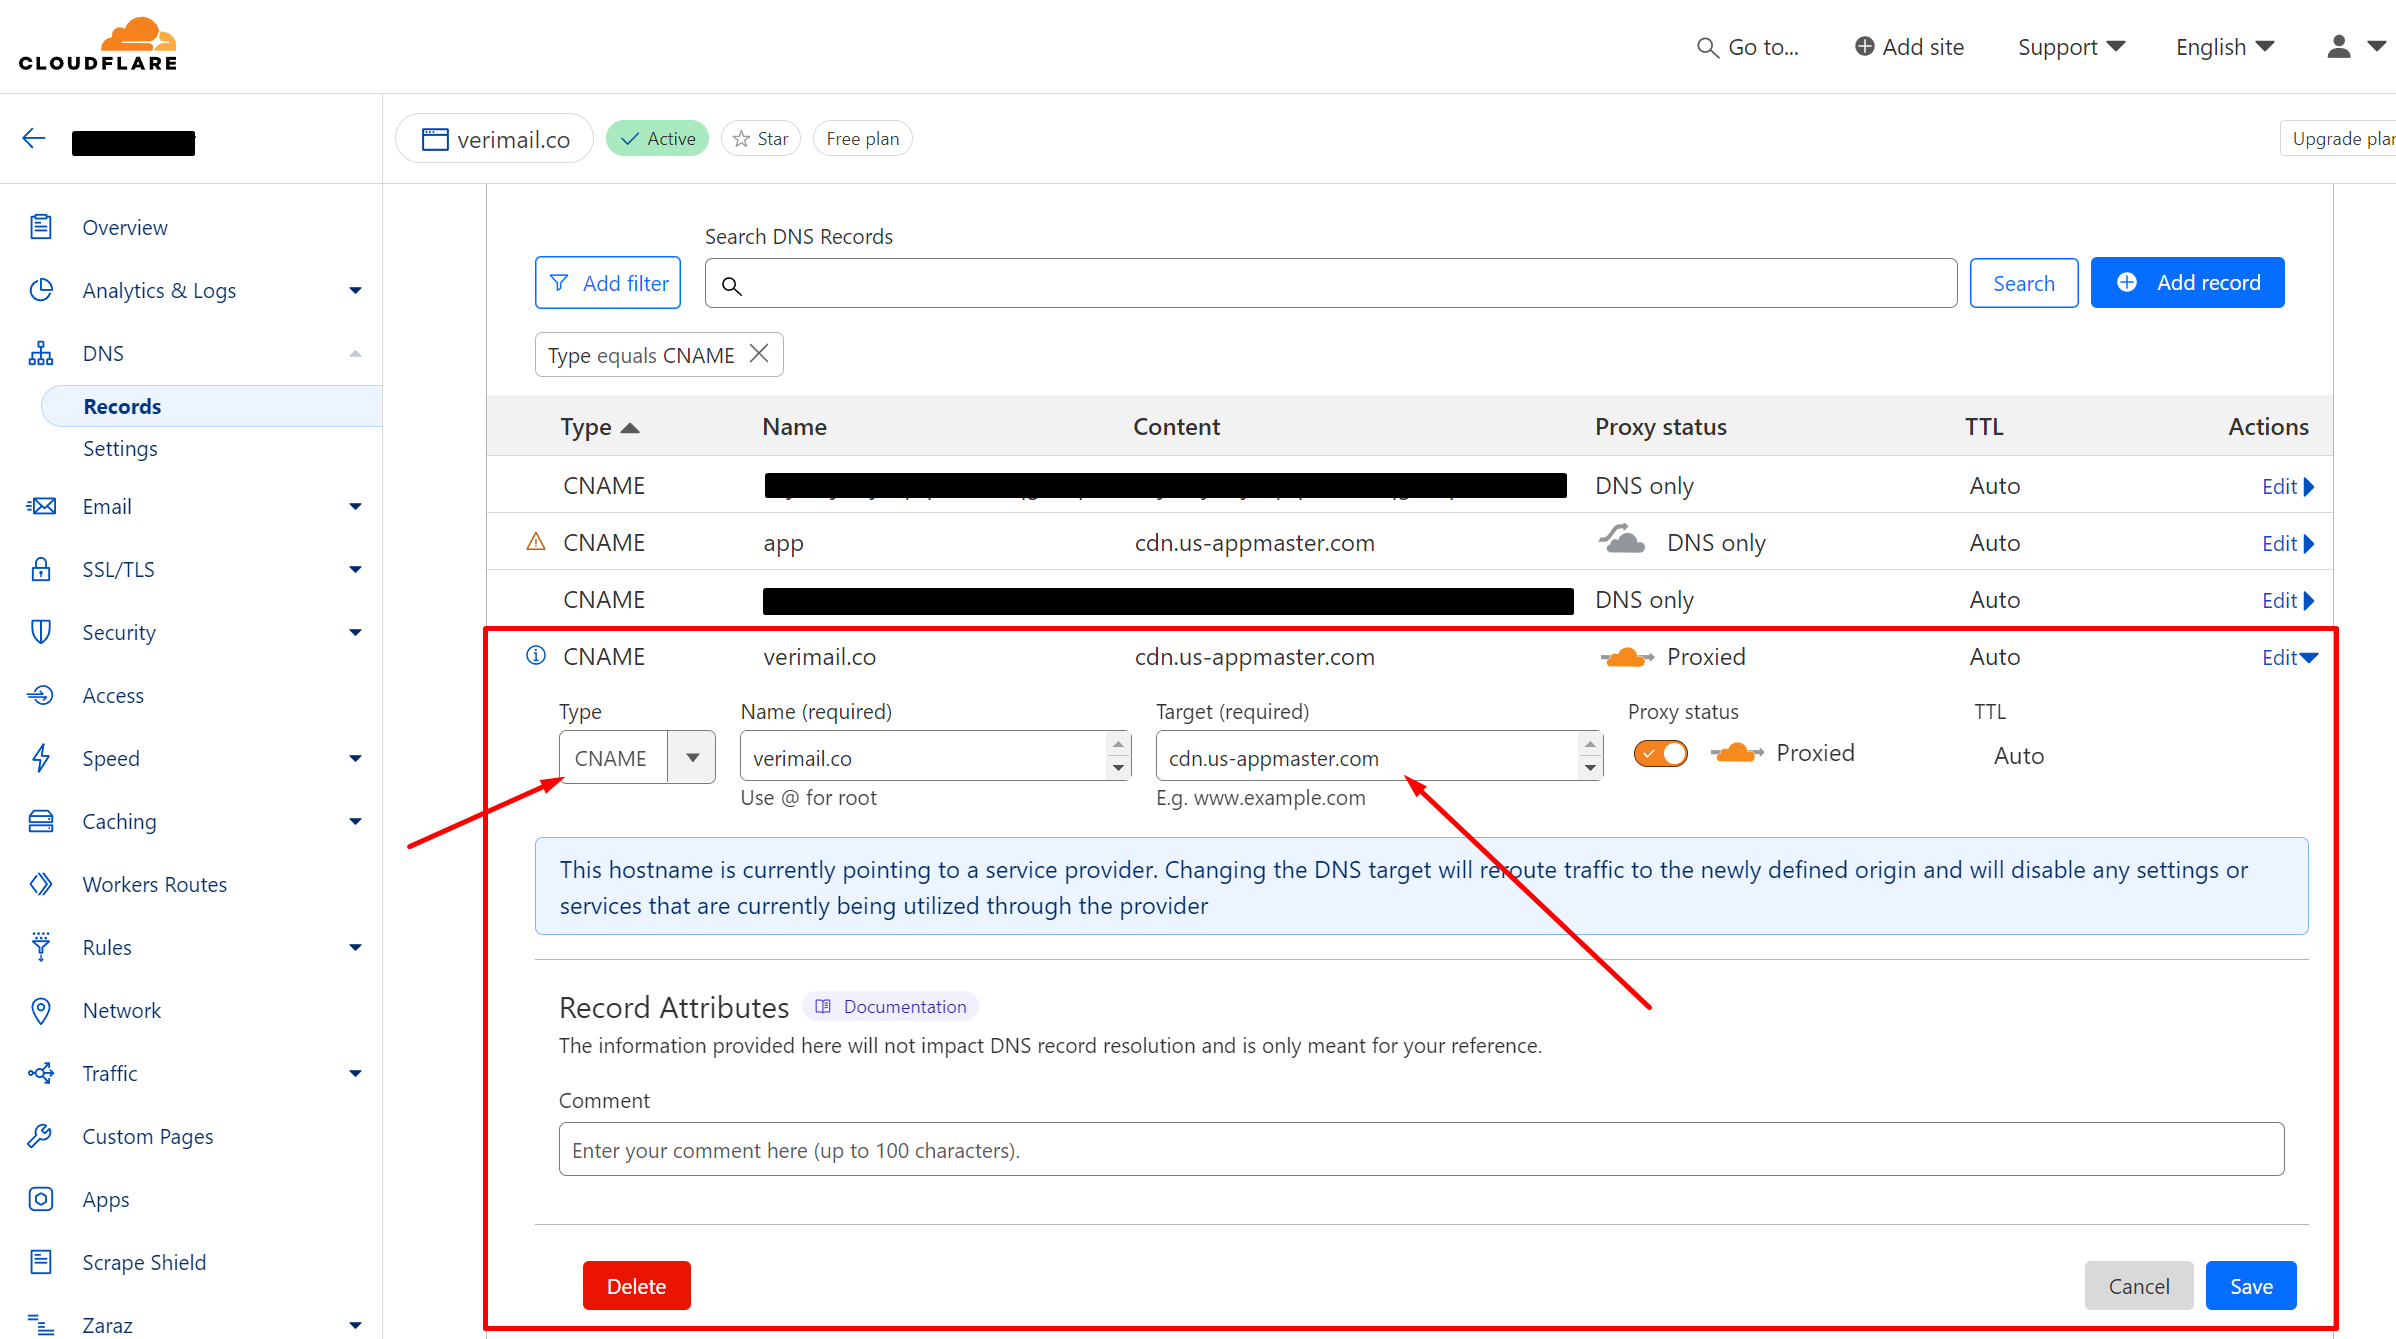
- Go to your domain registrar and create CNAME record pointing to the DNS name of the deploy plan. Please note that not every domain registrar allow you to setup CNAME record at the root domain (CF can).
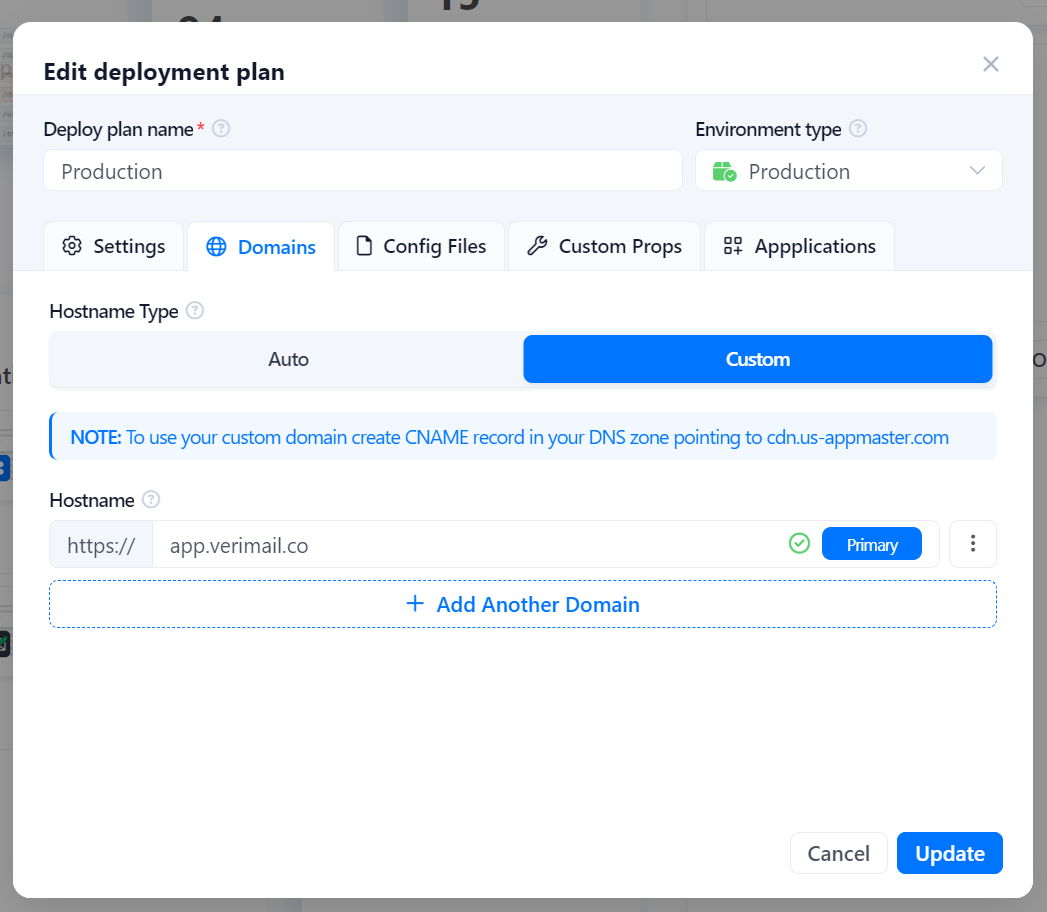
- Add your domain name to the deploy settings.
- Publish your application and wait ~10-20 minutes for validation and new SSL certificates.
We have additional settings for the complex use cases.
- You can add multiple custom domains to your deploy plan.
- Only one custom domain can be primary one, all additional will be added as secondary.
- For every secondary domain you can choose between 2 modes: standalone that will work as alias and redirect that will redirect any request to your primary domain.
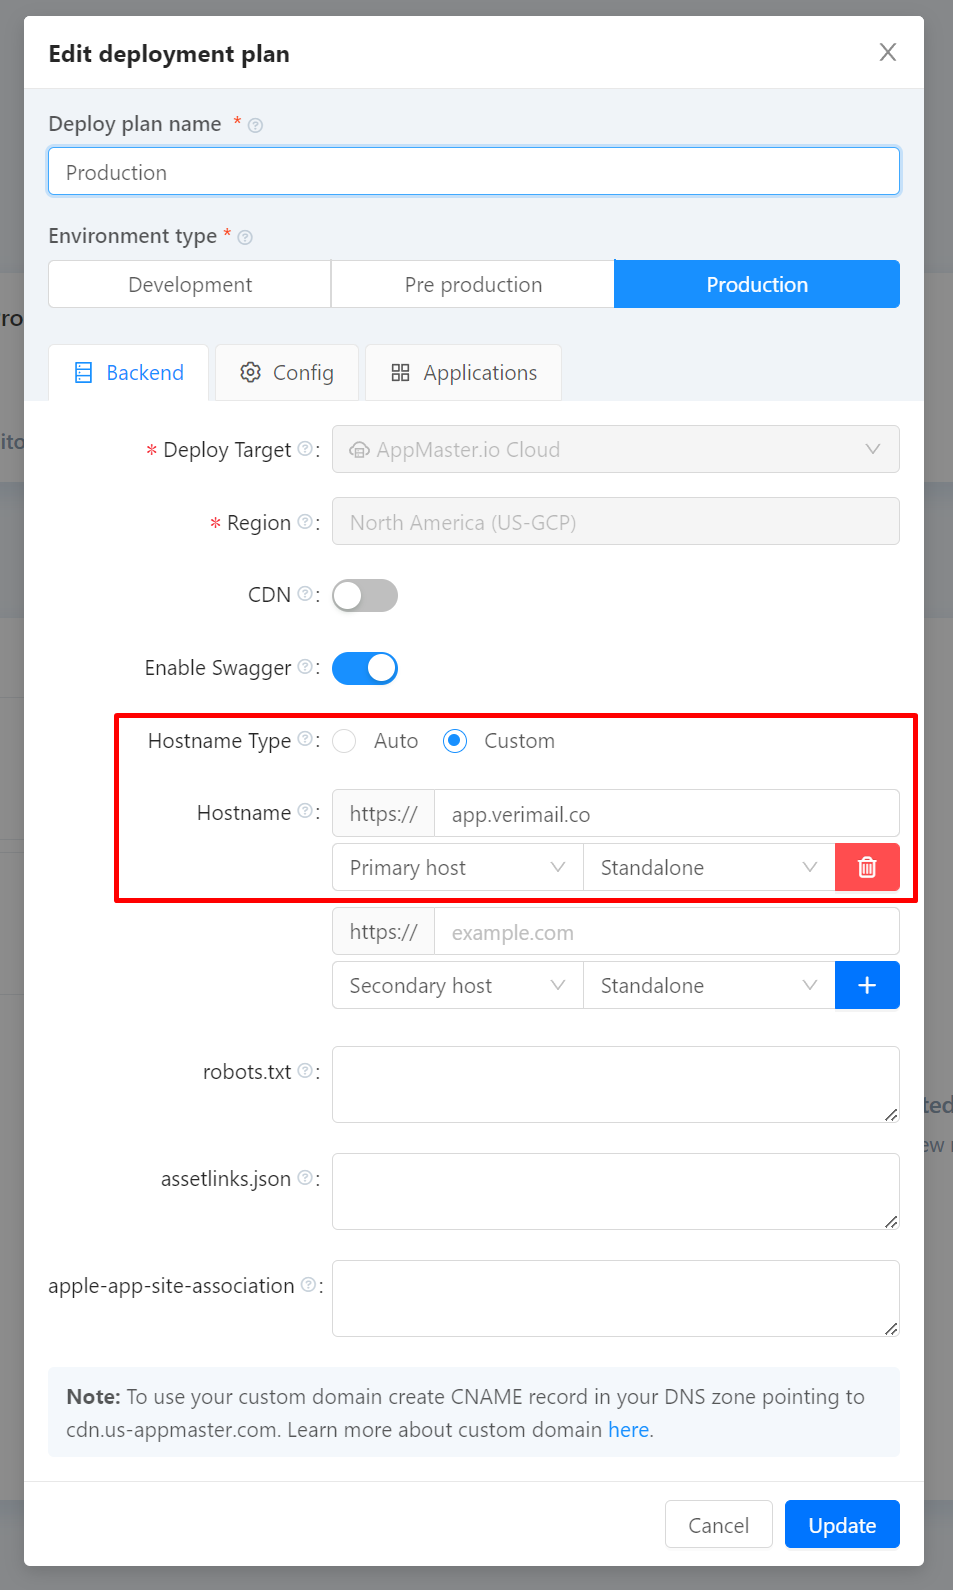
If you use our latest Studio Beta settings modal will be slightly different, but the process is the same.