A Comprehensive Guide to Android In-App Purchases (IAP)
Introduction to In-App Purchases (IAP)
In-App Purchases (IAP) are a method used in mobile apps to allow users to buy additional content or services. These can range from extra lives in a game to premium features in a productivity app. There are generally three types of in-app purchases:
- Consumables: Items that are used up once purchased, like virtual coins or health points.
- Non-consumables: Permanent purchases that the user keeps forever, like ad removal or a pro version of the app.
- Subscriptions: Recurring purchases, such as a monthly or yearly subscription to a service.
Understanding these types will help you better integrate and manage IAPs within your app, leveraging the Google Play Console and our Business Process Editor.
Creating Purchases in Google Play Console
To start with creating in-app purchases, follow these steps:
- Log in to the Google Play Console.
- Select your app.
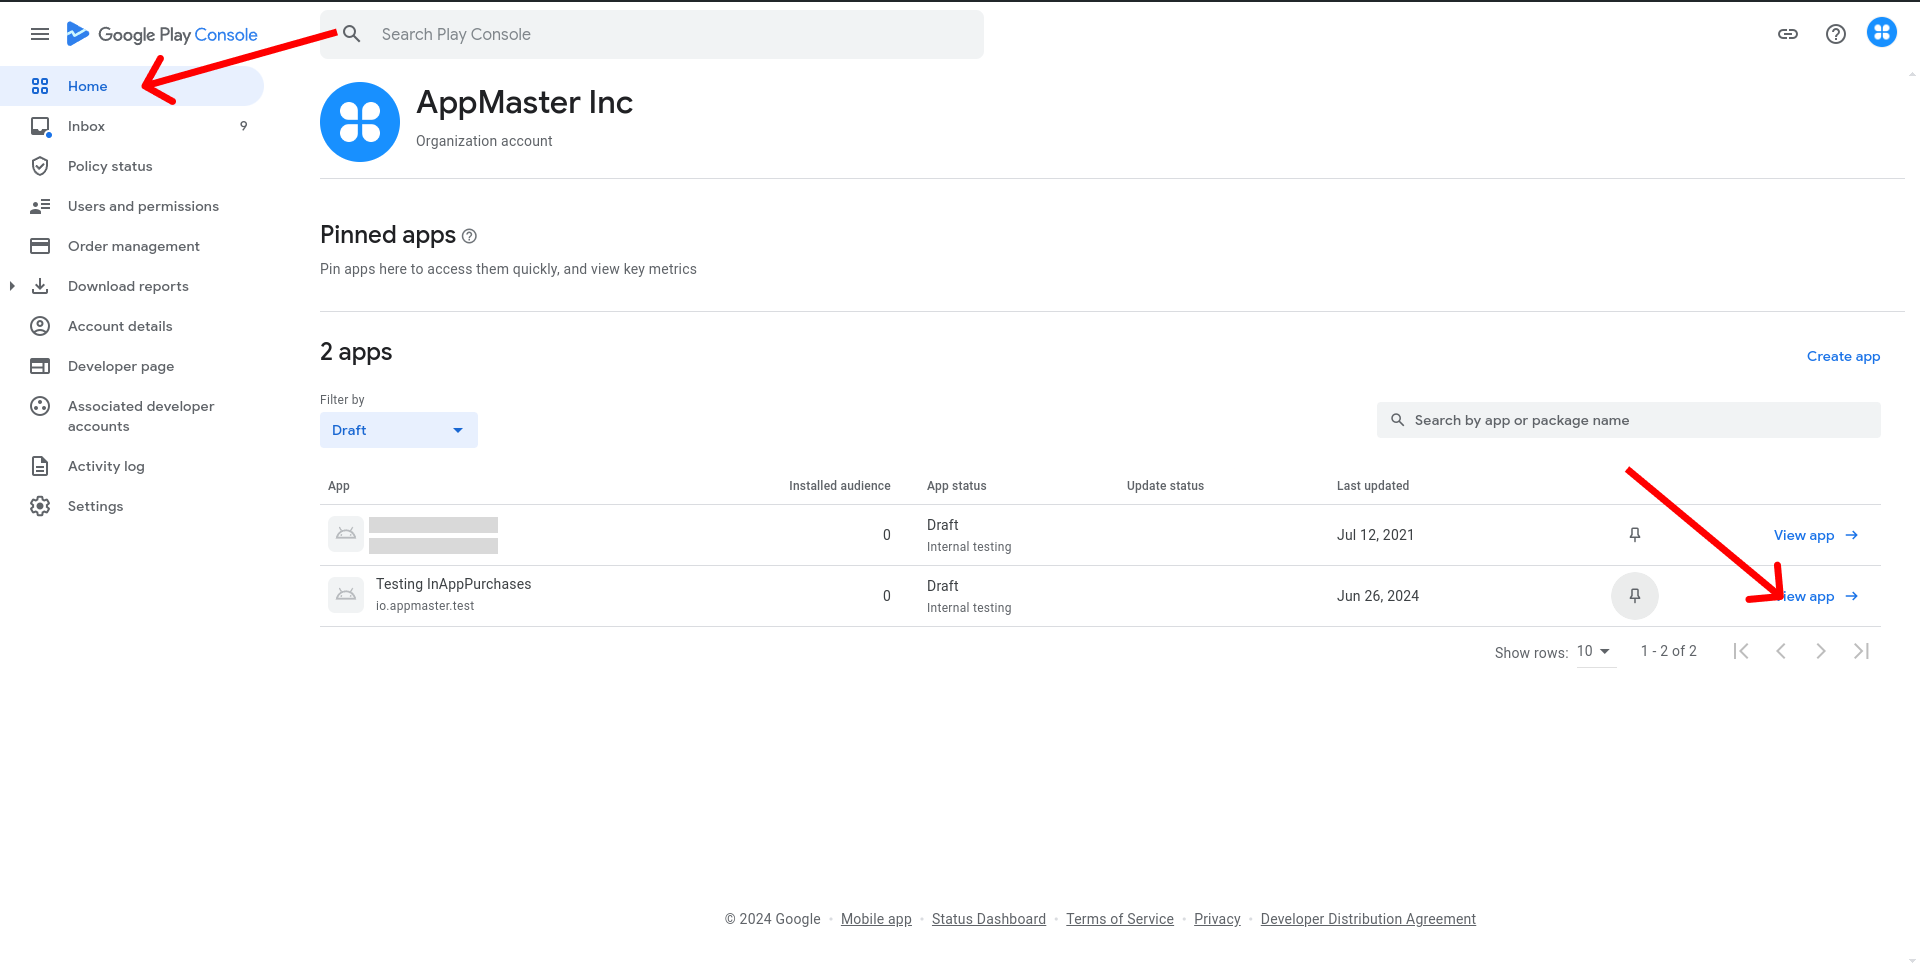
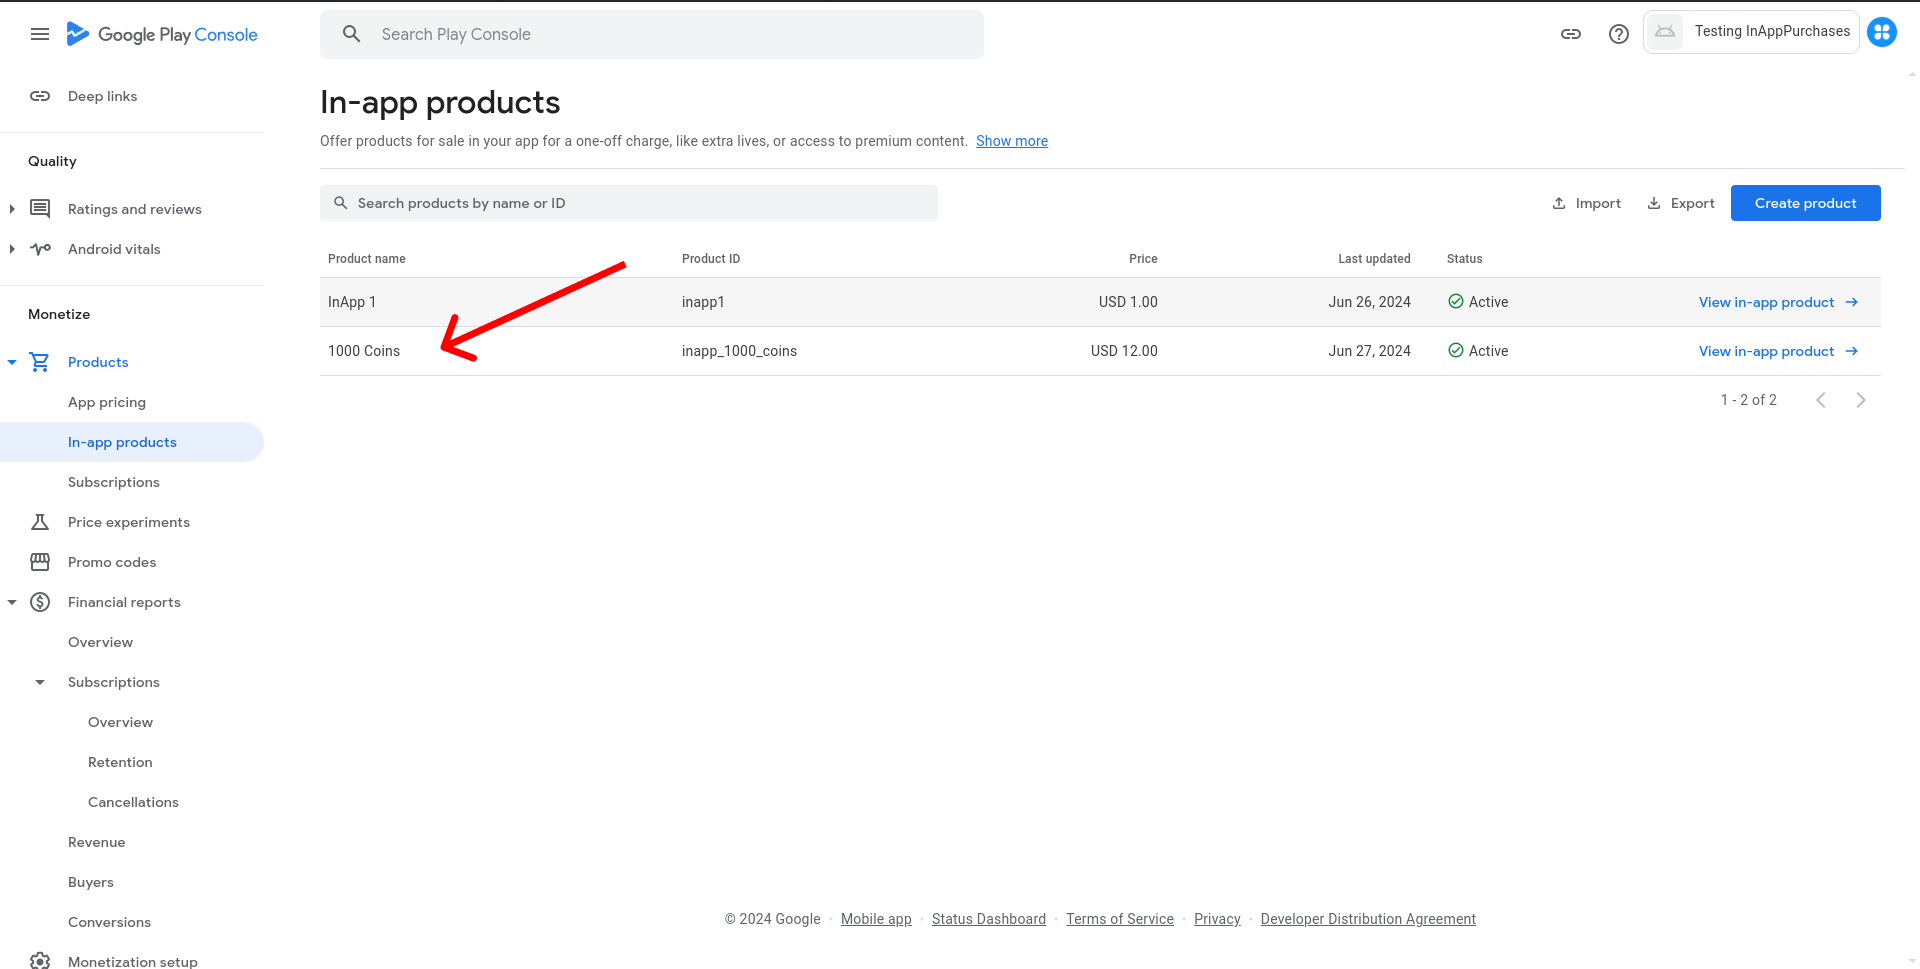
3. Navigate to Monetize > Products > In-app products.

4. Click on Create Product.
5. Choose the Product ID.
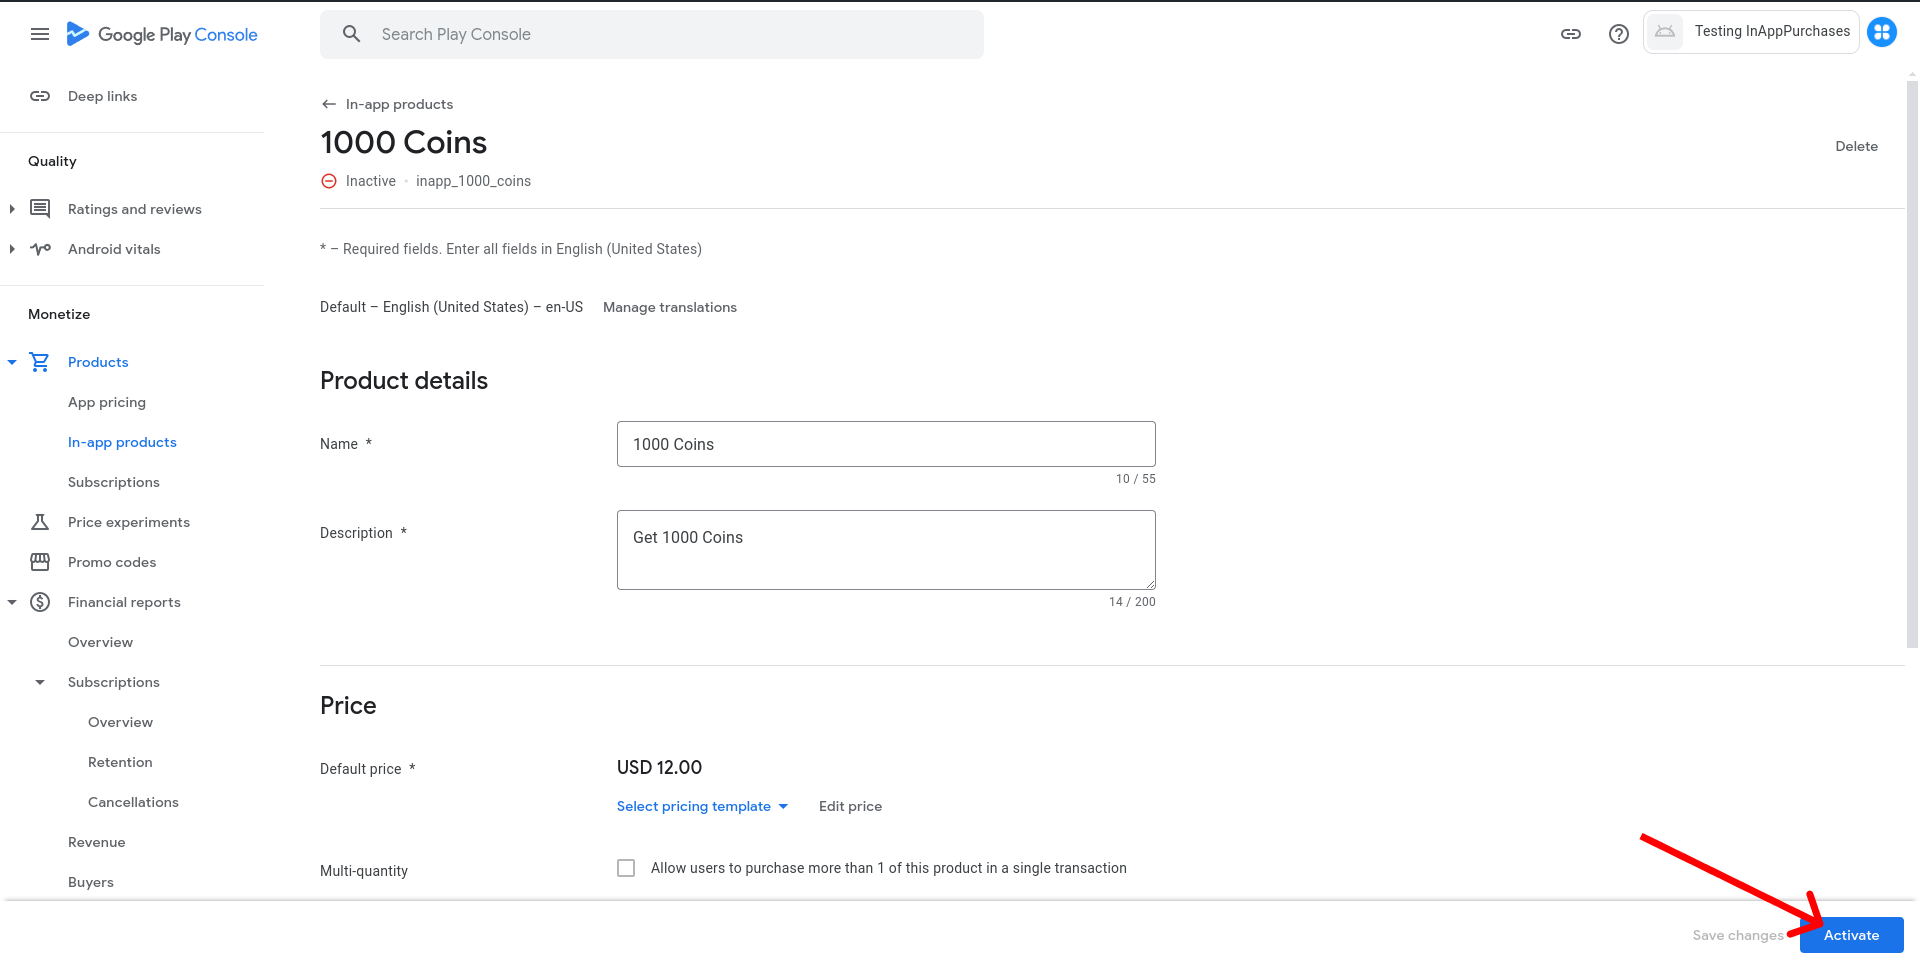
6. Fill in the details for your product, such as Name, Description, and Price.
7. Click on Save and Activate.
Note: Ensure that each product has a unique Product ID and is categorized correctly to avoid issues during the purchasing process.
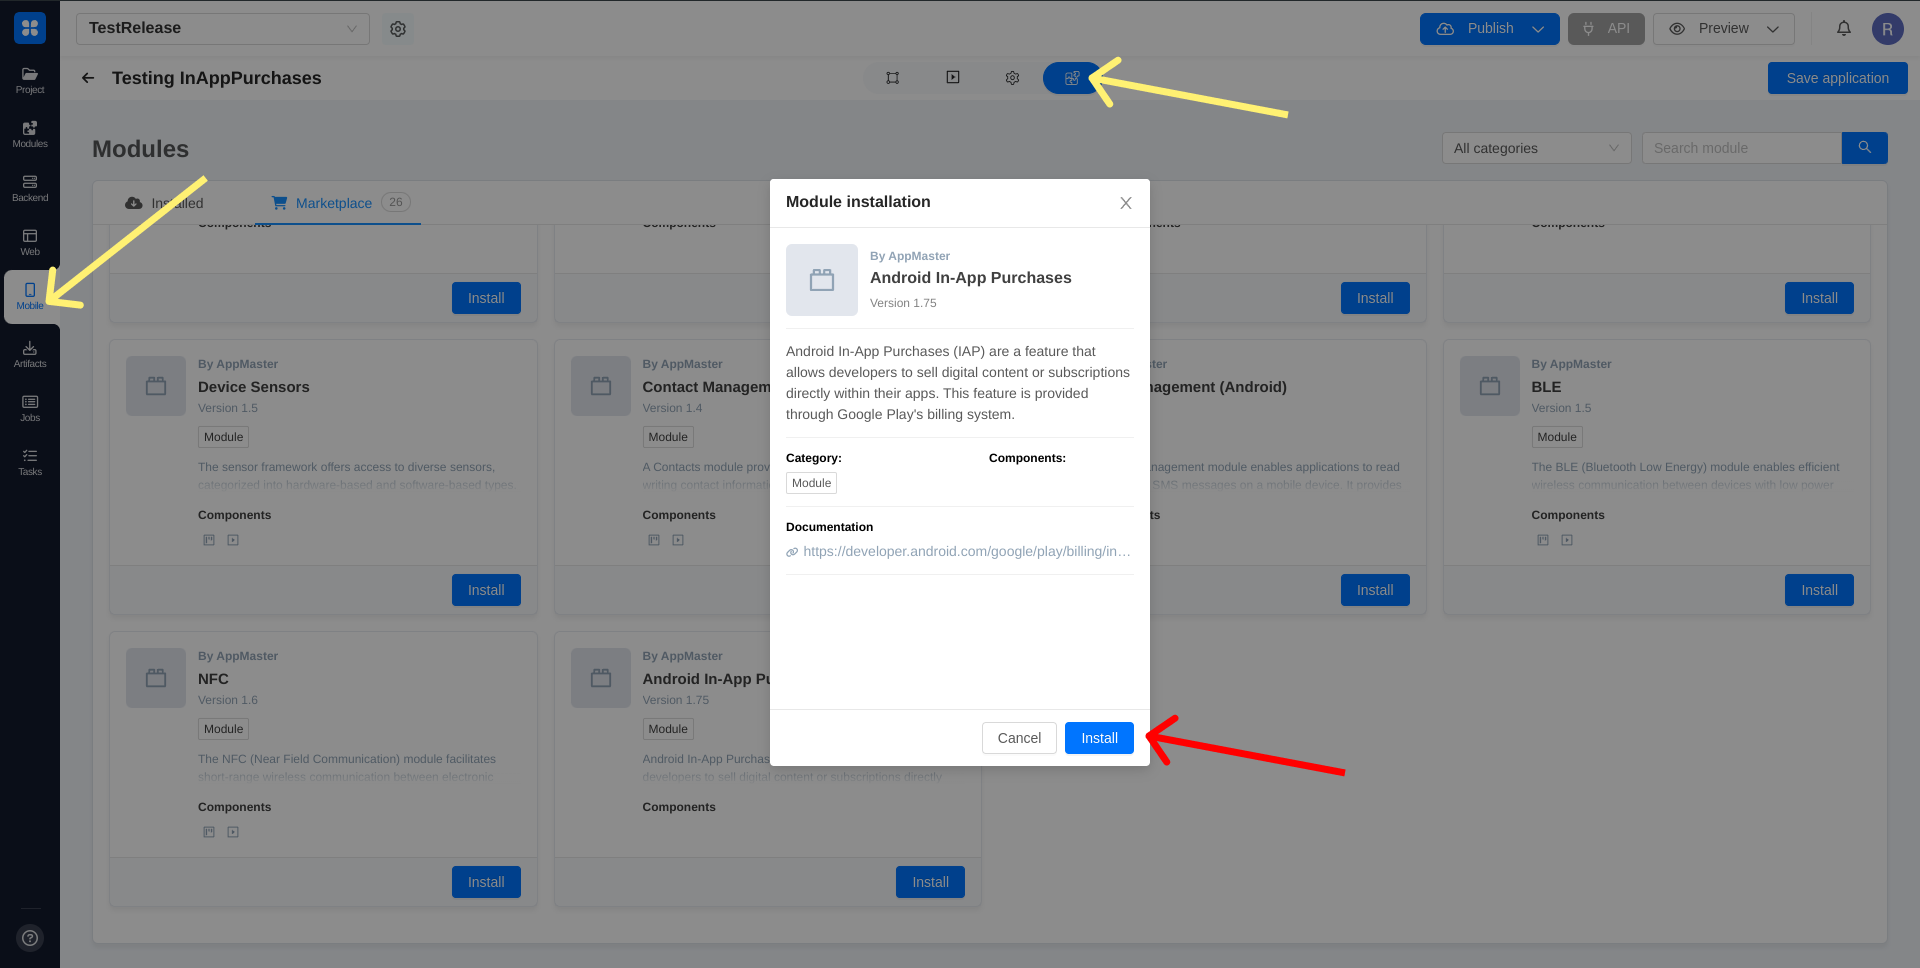
Install module Android In-App Purchases.
Integrating IAP with Our Business Process Editor
Our Business Process Editor provides various business process blocks to manage and handle IAP. Below are detailed instructions on how to use each block:
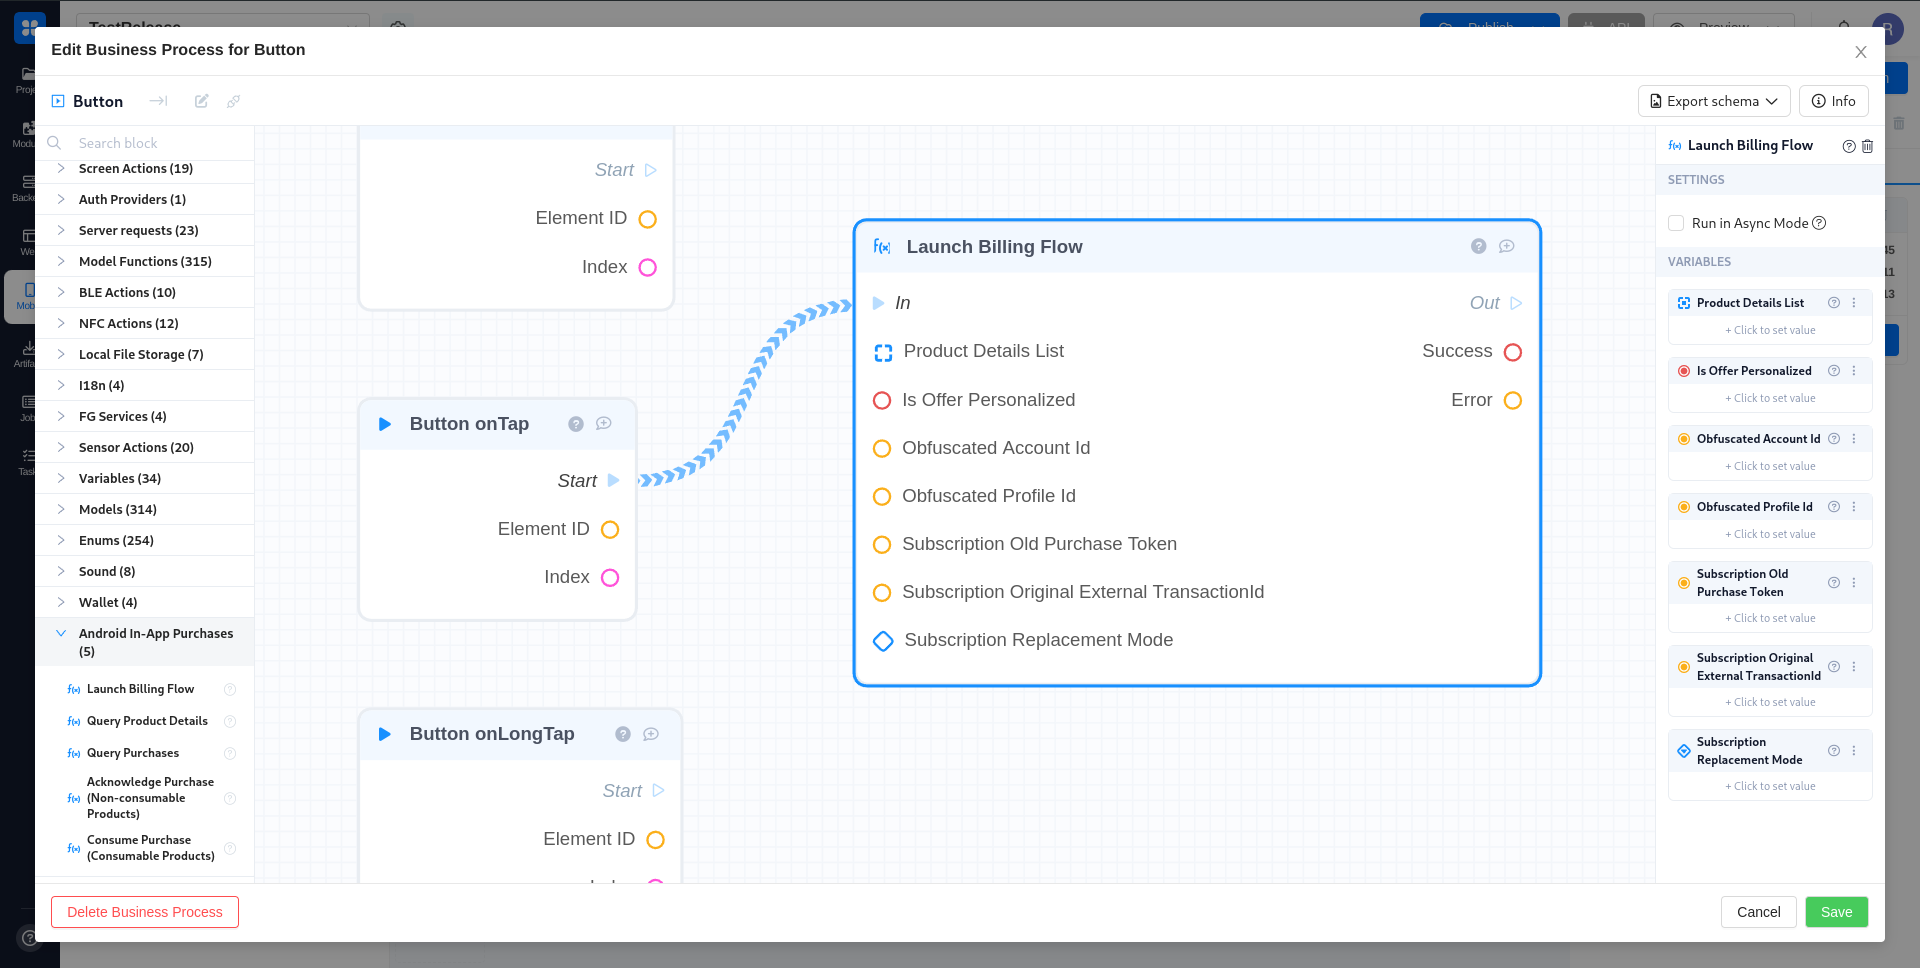
1. Launch Billing Flow
Description: Initiates the billing flow for an in-app purchase or subscription. It shows the Google Play purchase screen and the result will be delivered via the onPurchasesUpdated trigger.
Inputs:
- Product Details List: Specifies the ProductDetails of the items being purchased.
- Is Offer Personalized: Specifies whether the offer is personalized to the buyer.
- Obfuscated Account Id: An optional obfuscated string uniquely associated with the user’s account in your app.
- Obfuscated Profile Id: An optional obfuscated string uniquely associated with the user’s profile in your app.
- Subscription Old Purchase Token: Specifies the Google Play Billing purchase token that the user is upgrading or downgrading from.
- Subscription Original External TransactionId: If the originating transaction for the subscription that the user is upgrading or downgrading from was processed via alternative billing, specifies the external transaction id of the originating subscription.
- Subscription Replacement Mode: Specifies the Subscription Replacement Mode for replacement.
Outputs:
- Success: Boolean indicating success.
- Error: Error message, if any.
2. Query Product Details
Description: Performs a network query to get the details of products available for sale in your app.
Inputs:
- Product IDs: List of Product IDs.
- Product Type: Product Type.
Outputs:
- Product Details List: List of Product Details.

3. Query Purchases
Description: Returns purchase details for currently owned items bought within your app. Only active subscriptions and non-consumed one-time purchases are returned.
Inputs:
- Product Type: Product Type.
Outputs:
- Purchases: List of purchases.
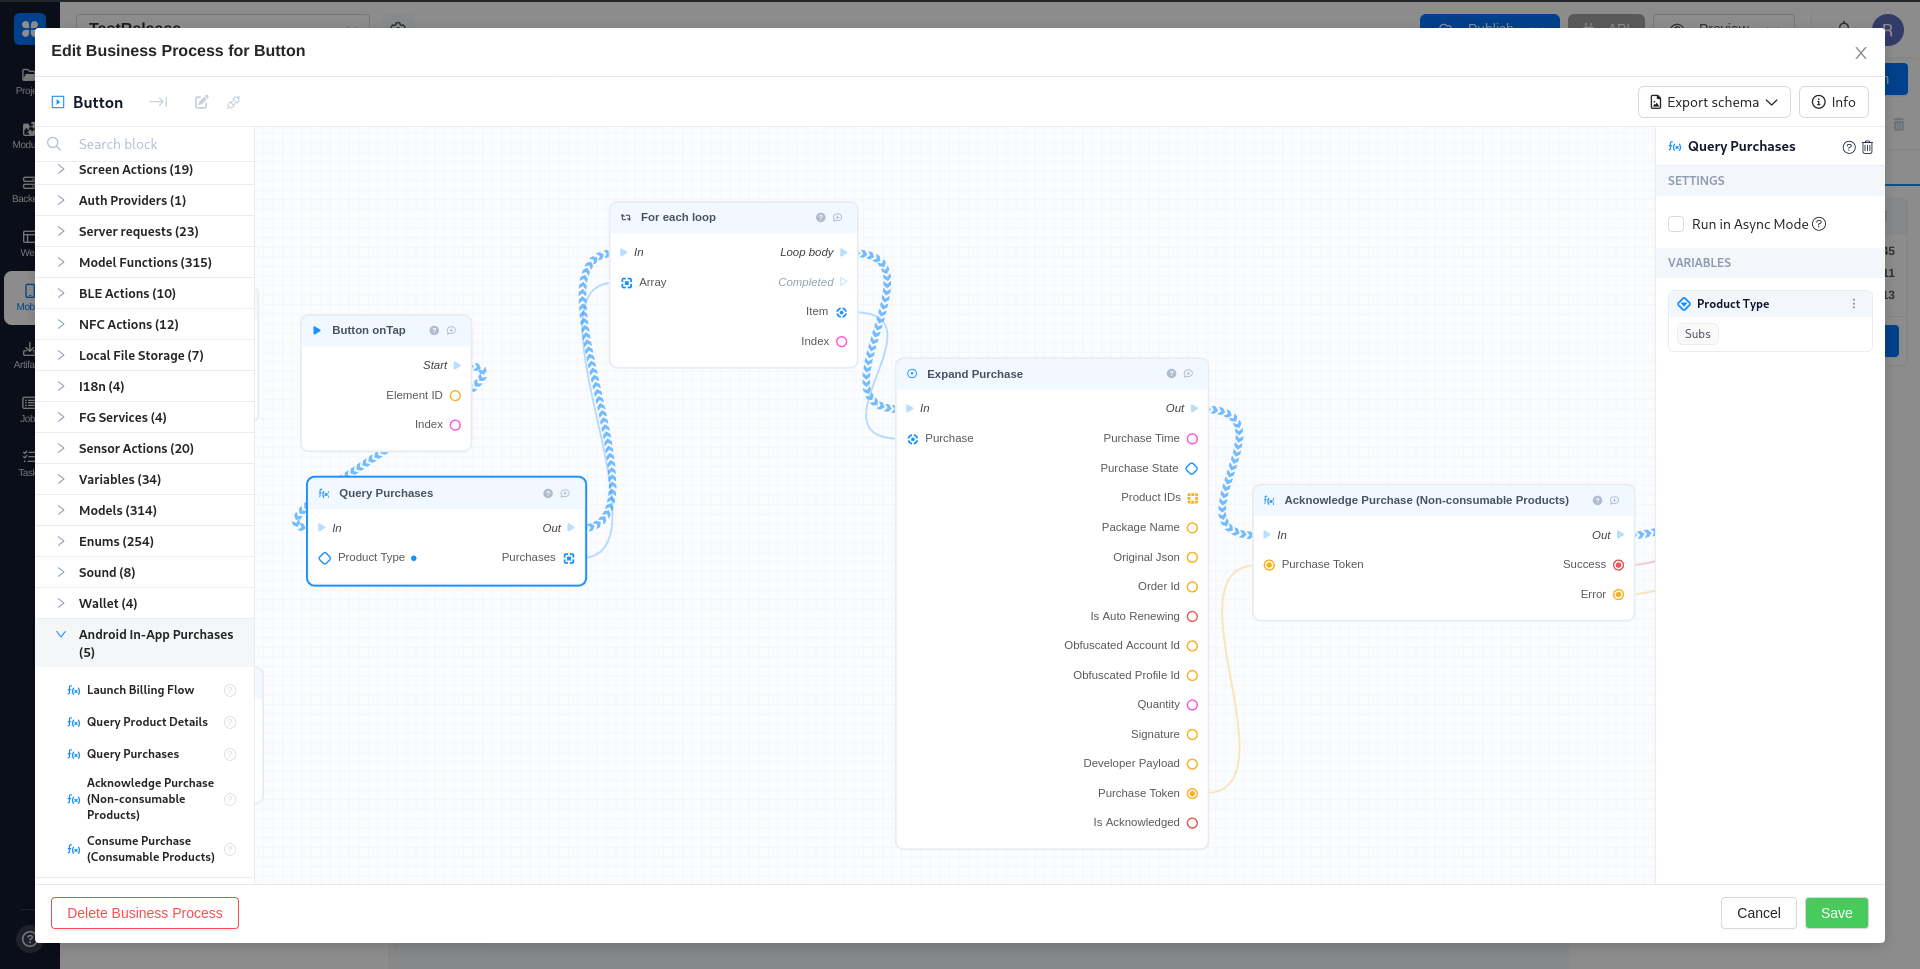
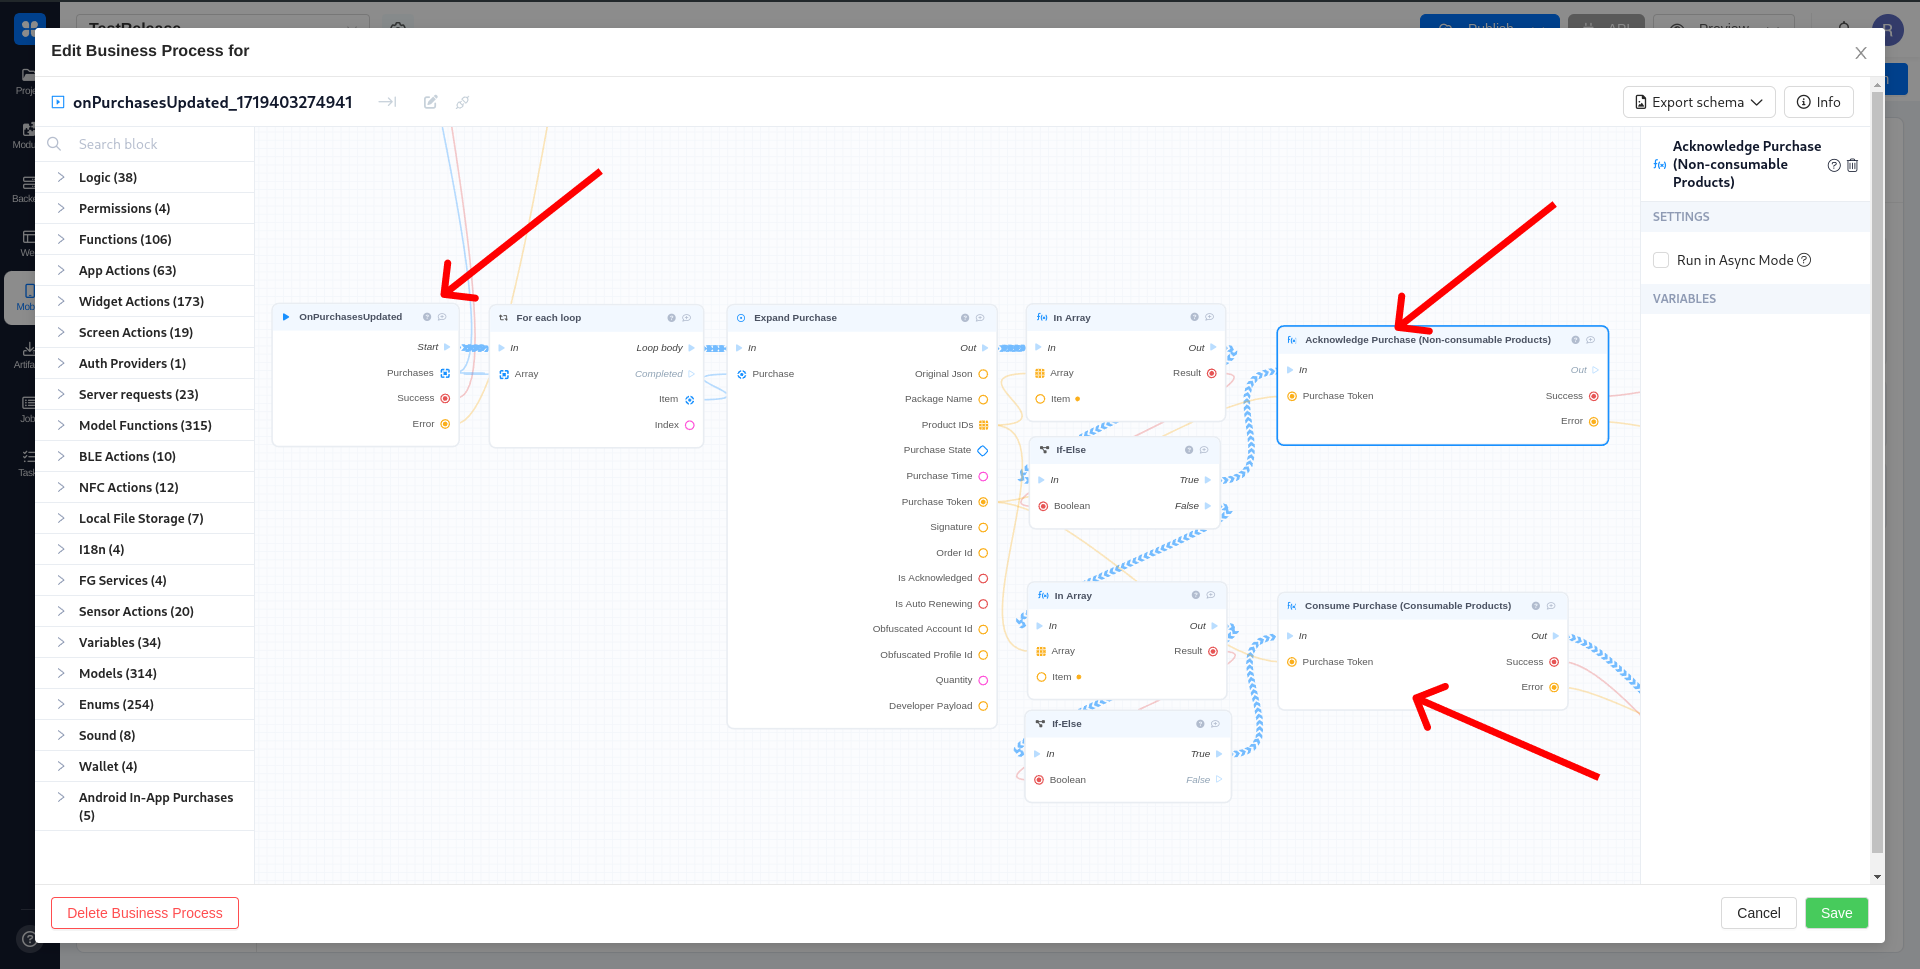
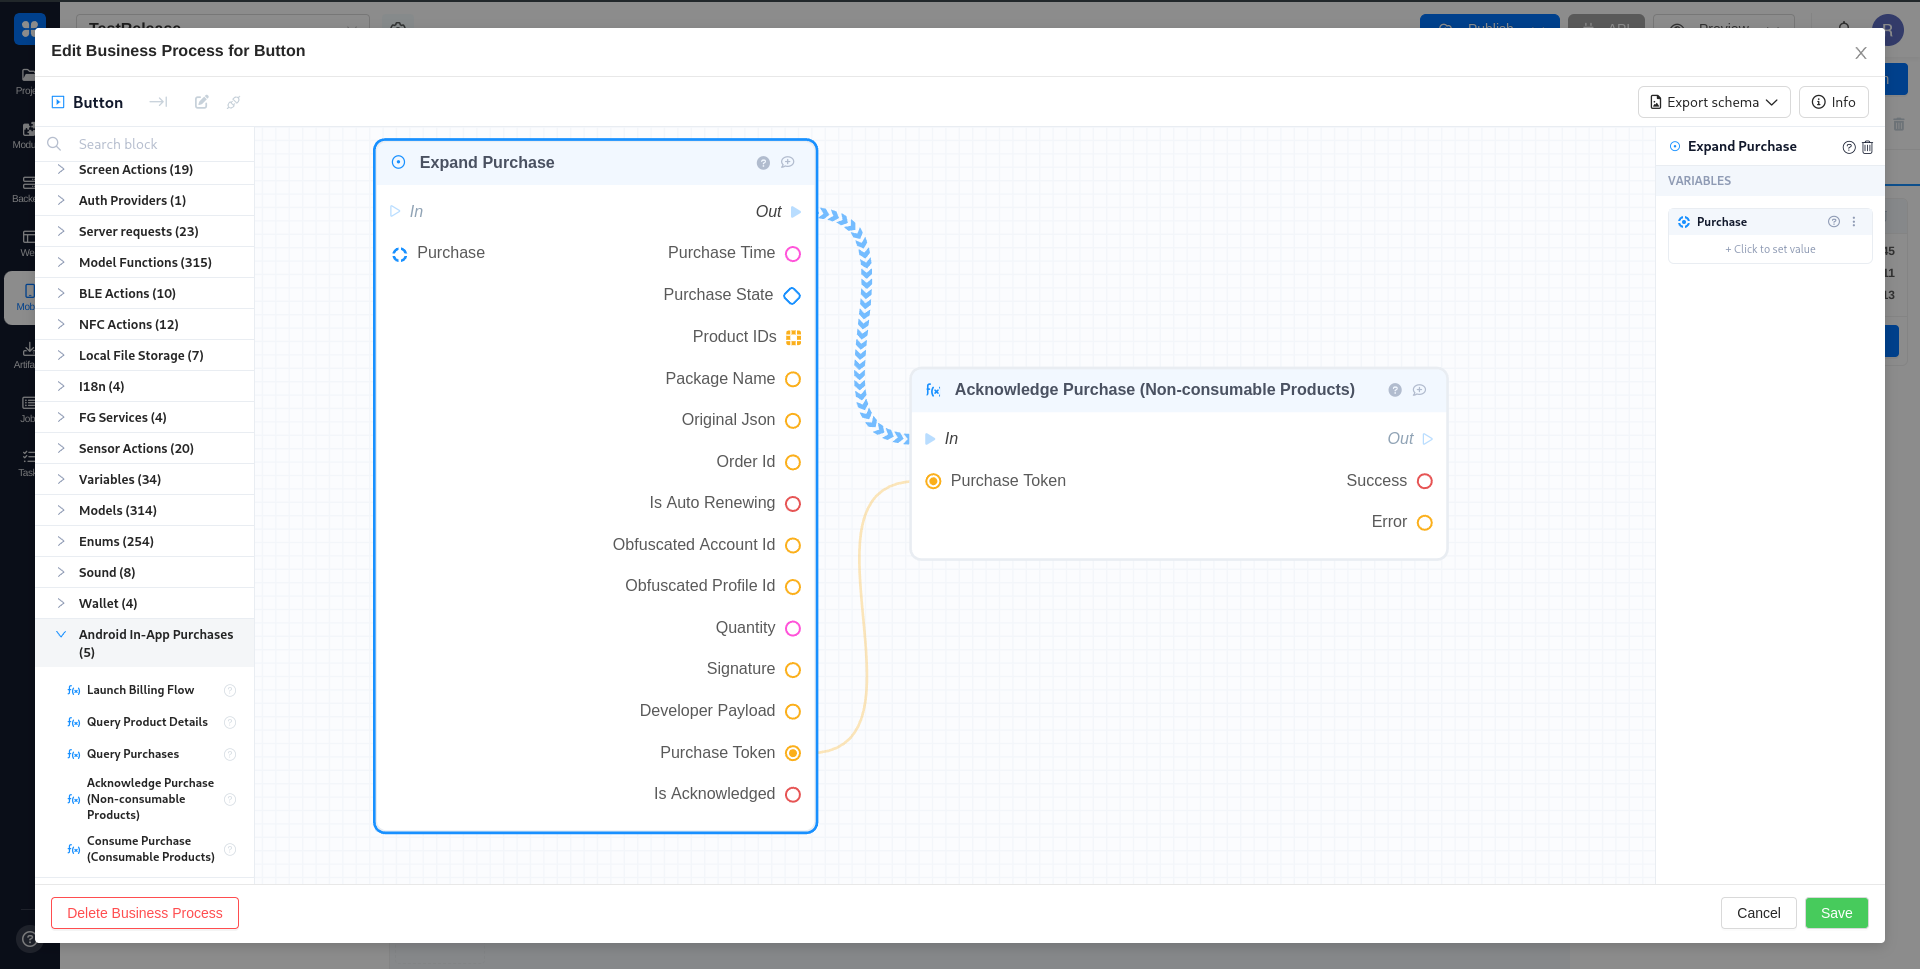
4. Acknowledge Purchase (Non-consumable Products)
Description: Used to acknowledge non-consumable purchases.
Note: To acknowledge non-consumable purchases, if your app has a secure backend, we recommend using Purchases.products:acknowledge to reliably acknowledge purchases. Make sure the purchase hasn’t been previously acknowledged by checking the acknowledgementState from the result of calling Purchases.products:get. If your app is client-only, use “Acknowledge Purchase (Non-consumable Products)” block.
Inputs:
- Purchase Token: Token that identifies the purchase to be acknowledged.
Outputs:
- Success: Boolean indicating success.
- Error: Error message, if any.
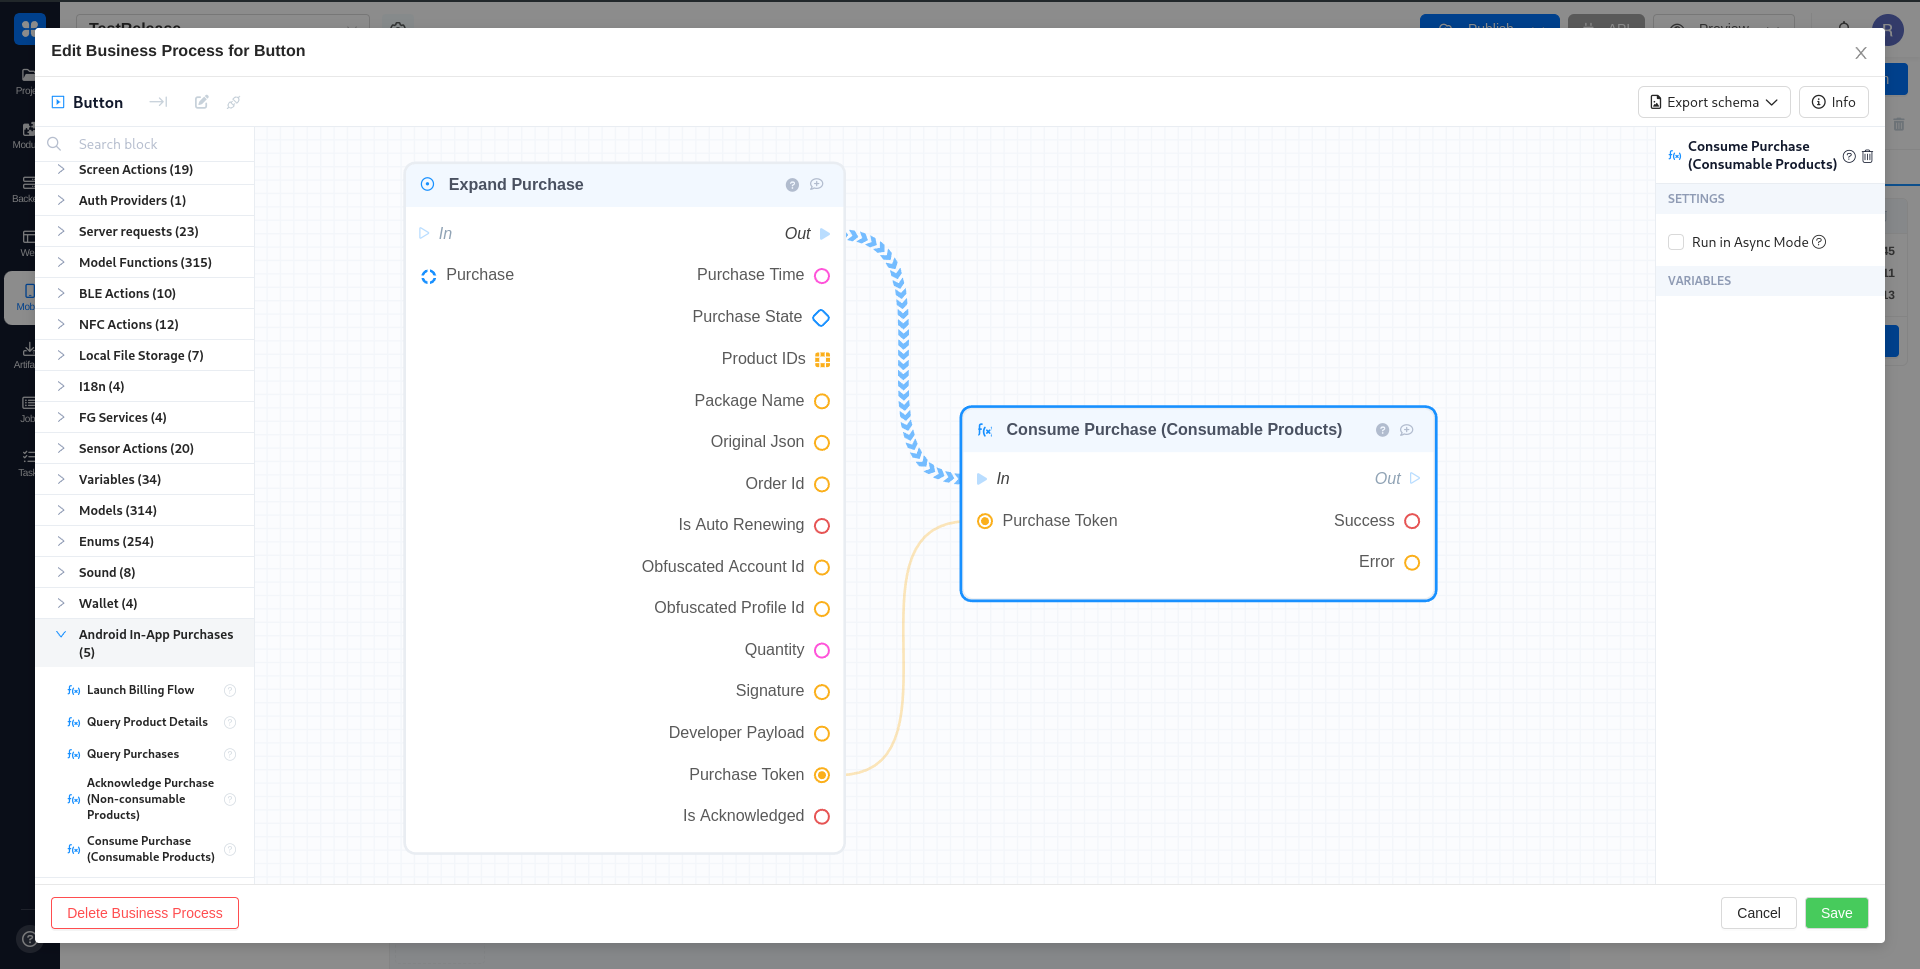
5. Consume Purchase (Consumable Products)
Description: Used to confirm consumable purchases.
Note: For consumables, if your app has a secure backend, we recommend that you use Purchases.products:consume to reliably consume purchases. Make sure the purchase wasn’t already consumed by checking the consumptionState from the result of calling Purchases.products:get. If your app is client-only without a backend, use “Consume Purchase (Consumable Products)” block.
Inputs:
- Purchase Token: Token that identifies the purchase to be acknowledged.
Outputs:
- Success: Boolean indicating success.
- Error: Error message, if any.
Triggers
These triggers help in managing IAP processes by listening to specific events:

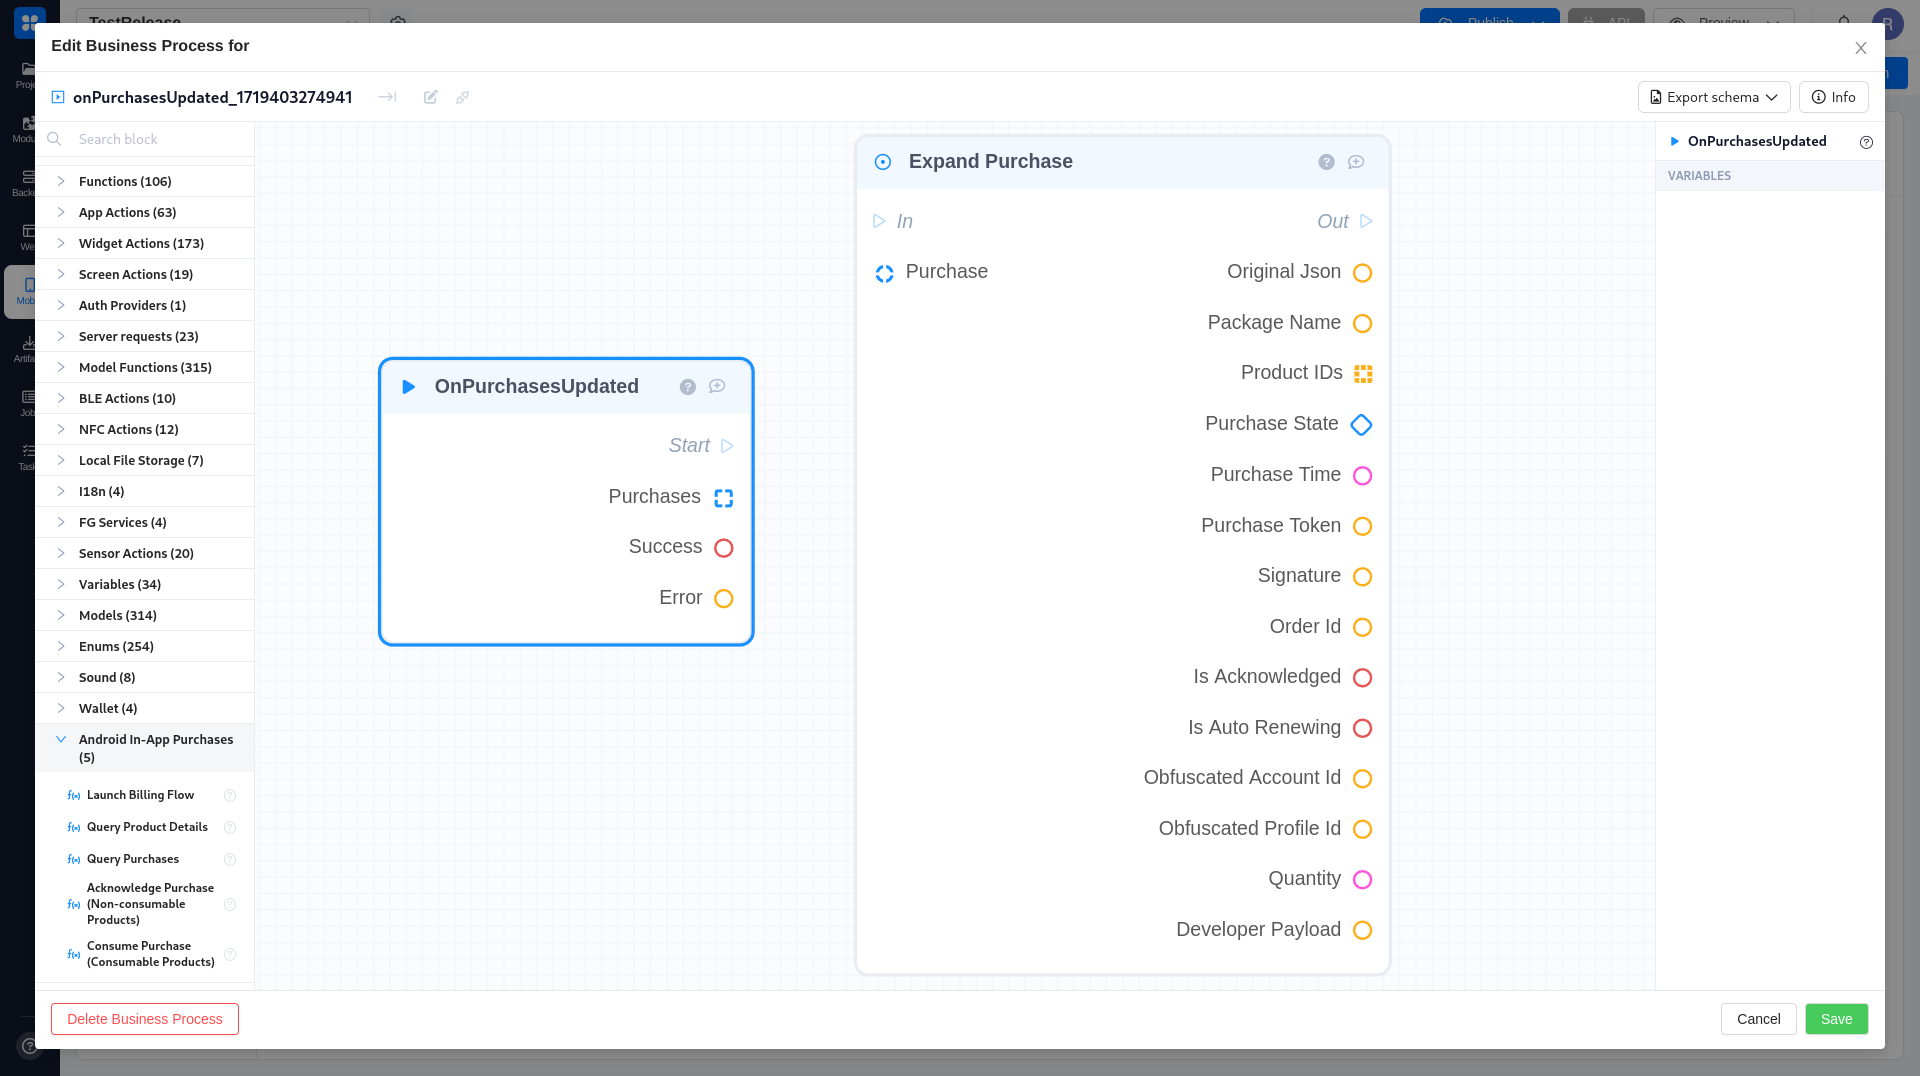
1. onPurchasesUpdated
Description: Listener trigger for purchase updates which happen when the user buys something within the app or by initiating a purchase from Google Play Store.
Outputs:
- Purchases: List of purchases.
- Success: Boolean indicating success.
- Error: Error message, if any.
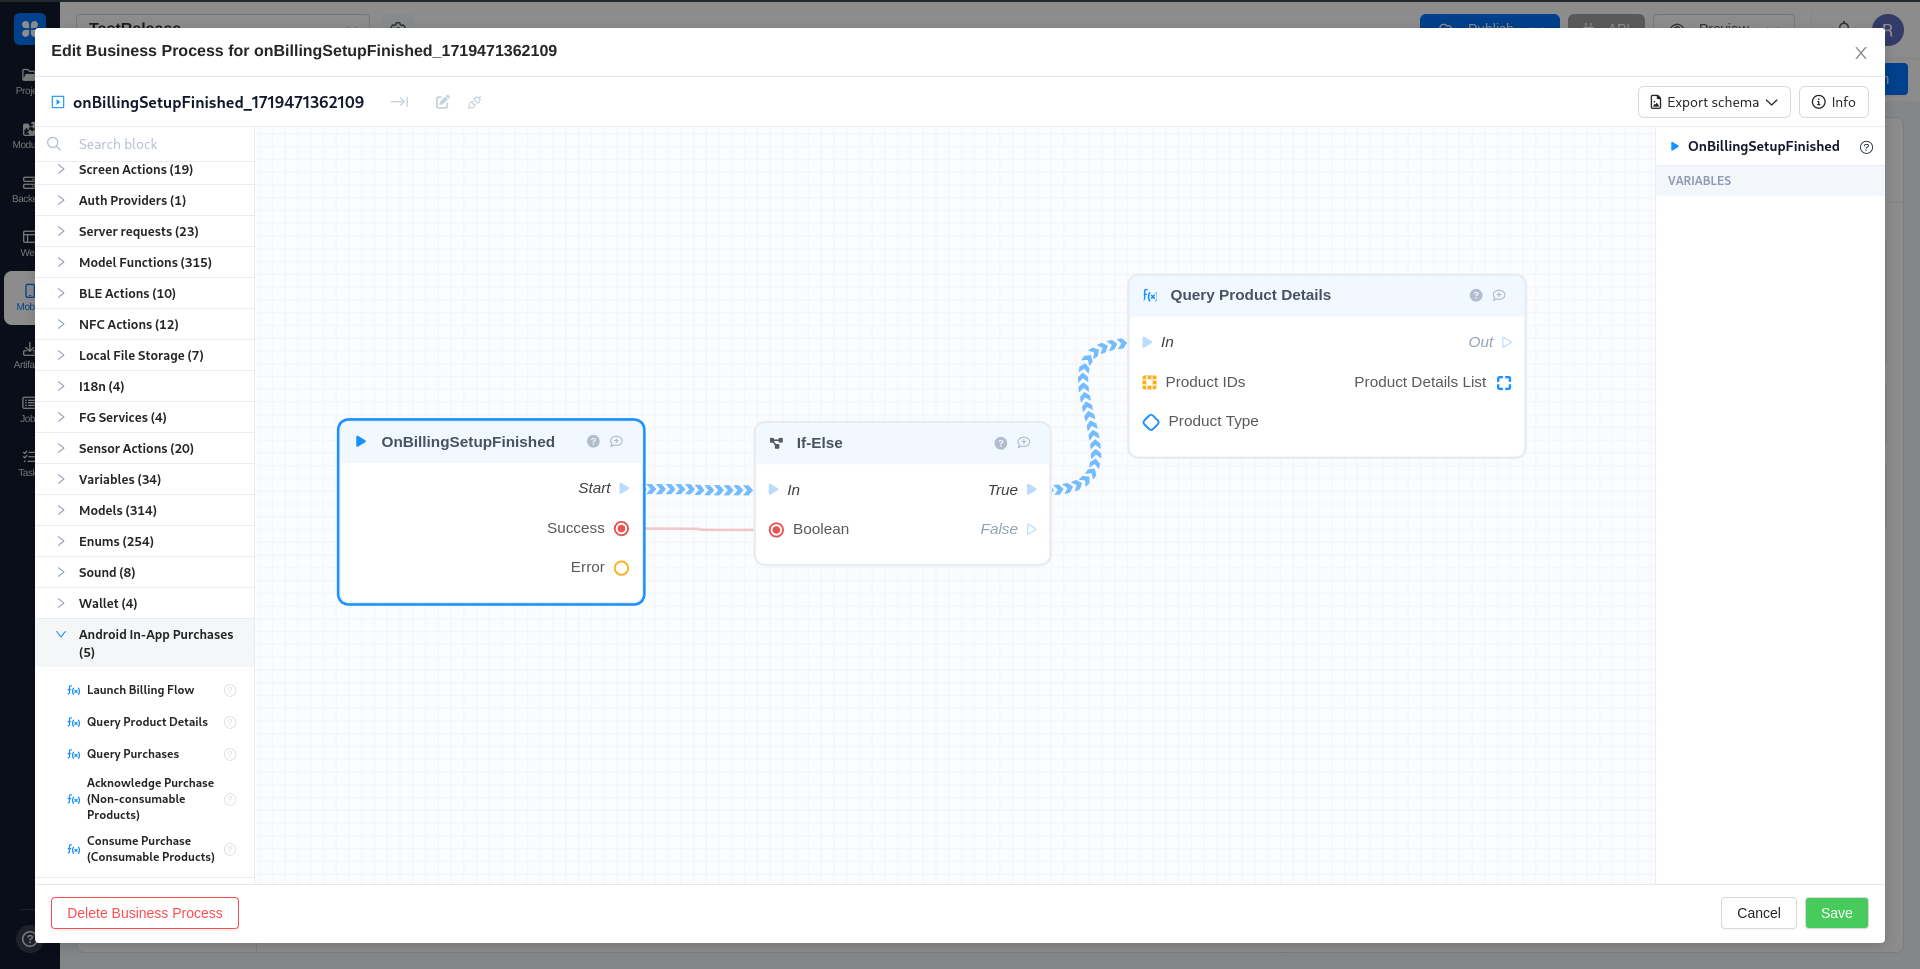
2. onBillingSetupFinished
Description: Called to notify that setup is complete.
Outputs:
- Success: Boolean indicating success.
- Error: Error message, if any.
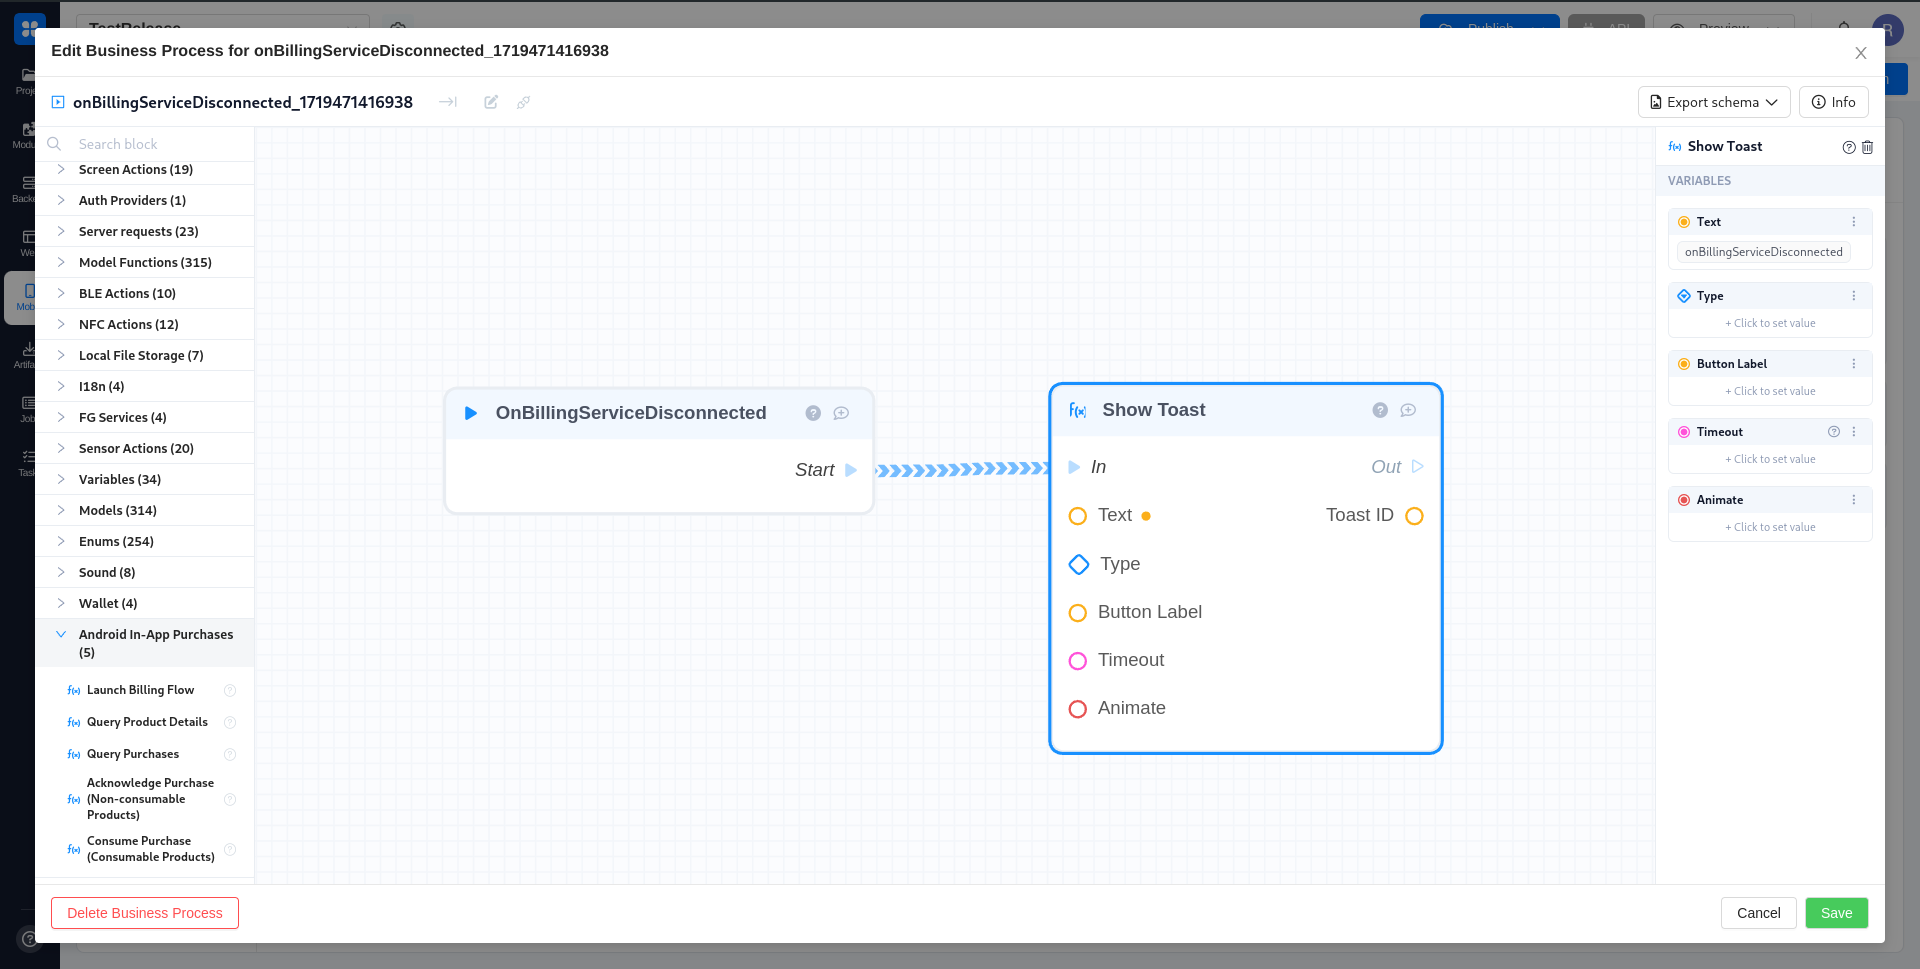
3. onBillingServiceDisconnected
Description: Called to notify that the connection to the billing service was lost.
Using “Query Product Details” and “Launch Billing Flow” to Open the Payment Page
To enable users to make purchases within your app, you’ll need to first query the product details and then initiate the billing flow for the selected product. Here’s a step-by-step guide on how to do this using the “Query Product Details” and “Launch Billing Flow” blocks in our Business Process Editor.
Step 1: Query Product Details
-
Use the “Query Product Details” block
-
Retrieve the Product Details List:
- After executing the “Query Product Details” block, you’ll receive a list of product details. This list contains information about all the available products, such as their names, descriptions, and prices.
-
Display the Products to Users:
- Present the list of products to your users in a user-friendly format. This could be a list or a grid showing product names, descriptions, and prices. Allow users to browse through the available products and make a selection.

Step 2: Launch Billing Flow
-
Use the “Launch Billing Flow” block
-
Initiate the Billing Flow:
- When the user selects a product and proceeds to purchase, use the “Launch Billing Flow” block to initiate the billing process.
- This will display the Google Play purchase screen where users can complete their purchase securely.
-
Handle Purchase Updates:
- Use the
onPurchasesUpdatedtrigger to listen for purchase updates. This trigger will provide the status of the purchase (success or error) and the details of the purchased items.
- Use the
Example Workflow
-
Query Product Details:
- Execute the “Query Product Details” block with the appropriate product IDs and product type.
- Display the retrieved product details to the user.
-
User Selects a Product:
- Allow the user to select a product from the displayed list.
-
Launch Billing Flow:
- When the user confirms their selection, execute the “Launch Billing Flow” block with the selected product details to open the payment page.
- Handle the purchase update via the
onPurchasesUpdatedtrigger to “Acknowledge Purchase (Non-consumable Products)” or “Consume Purchase (Consumable Products)”.